
The portable gaming revolution is in full swing, and OLED displays have redefined how we experience handheld games on the go. The Nintendo Switch OLED model and the Valve Steam Deck OLED have captivated millions of players worldwide with their punchy saturation, instantaneous 0.1ms pixel response times, and true, inky blacks. From the bioluminescent forests of The Legend of Zelda: Tears of the Kingdom to the neon-drenched alleys of Cyberpunk 2077 and the razor-sharp underworld action of Hades II, self-emissive OLED panels elevate handheld gaming to breathtaking new heights.
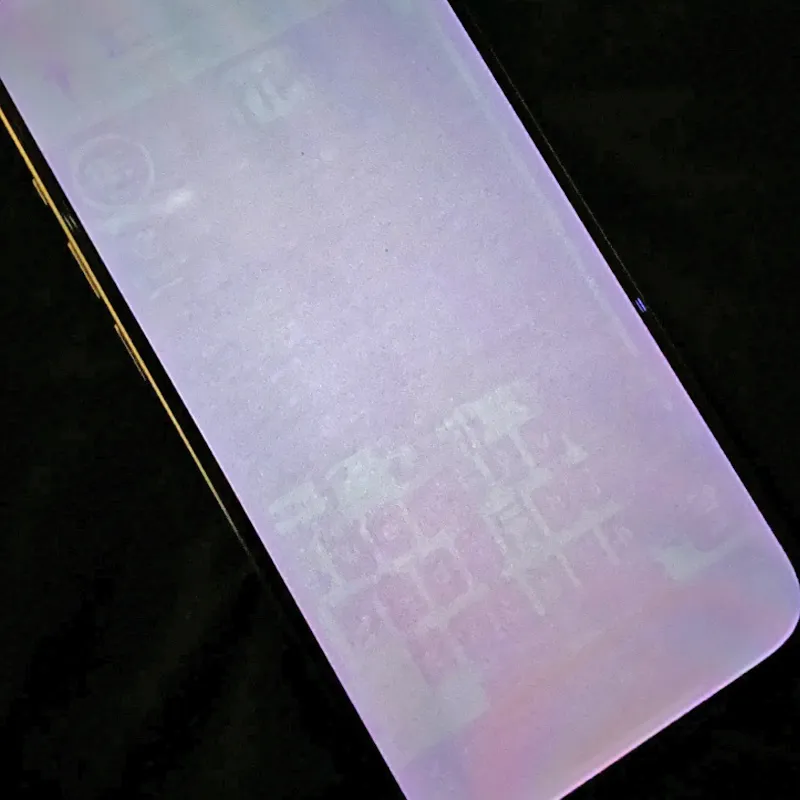
However, the transition from traditional backlit LCD screens to organic light-emitting diodes has reignited an enduring concern among portable gamers: handheld screen burn in. Handheld video games are saturated with static graphical user interface (HUD) elements—player health bars, stamina wheels, hearts, weapon ammo counters, action hotbars, and circular mini-maps that remain pinned to identical screen coordinates for dozens or even hundreds of hours. Can continuous handheld play permanently scar your portable display? In this authoritative 2026 guide, we analyze multi-thousand-hour extreme torture tests, explore the Steam Deck OLED's custom Samsung panel engineering, explain how to differentiate temporary retention from organic decay, and reveal how to run our dynamic screen fix tool directly on your handheld console.
Real-World Torture Tests: What 3,600+ and 7,000 Continuous Hours Revealed About Switch OLED Burn-In
When the Nintendo Switch OLED launched, hardware testers subjected the console to extreme endurance stress tests to establish empirical limits for panel degradation. The most famous and comprehensive test was orchestrated by tech reviewer Bob Wulff (Wulff Den), who placed a retail Nintendo Switch OLED under a continuous, non-stop torture marathon.
The Torture Methodology
To produce the absolute worst-case scenario for organic sub-pixel decay, Wulff configured the Switch OLED to display a single, completely static in-game screenshot from The Legend of Zelda: Breath of the Wild. The selected image featured extreme contrast: a bright white temple ceiling illuminated with glowing runes, intense blue sky, vibrant green foliage, and static white UI hearts in the top-left corner. The console was kept plugged into constant wall AC power, screen brightness was locked at a searing 100%, and auto-sleep was disabled 24 hours a day, 7 days a week.
Timeline of Torture Test Milestones
- 1,000 Hours (~41 Days Non-Stop): Zero image retention. Color uniformity remained 100% identical to a factory-fresh unit.
- 1,800 Hours (~75 Days Non-Stop): No perceptible ghosting or sub-pixel dimming on solid test slides or active game scenes.
- 3,600 Hours (~150 Days / 5 Months of Continuous Static Image): Testers detected the very first microscopic hint of image retention. When inspecting a full-screen, uniform solid white diagnostic test slide, a faint, barely perceptible greenish-blue tint variance appeared in the exact area where the high-brightness white temple ceiling had been glowing for 5 continuous months. Crucially, during normal gameplay in colorful titles like Mario Kart 8 Deluxe or Super Mario Odyssey, this retention was 100% invisible to the naked eye.
- 7,000 Hours (~291 Days / Nearly 10 Months Non-Stop): After almost ten months of unrelenting static torture at 100% brightness, the panel exhibited measurable sub-pixel luminance loss in the white ceiling region, leaving an identifiable silhouette on solid color backgrounds. Yet remarkably, even after 7,000 hours of continuous static exposure, the console was still fully functional and entirely playable across varied games.
Translating 7,000 Torture Hours into Real-World Gaming Lifespans
It is vital to appreciate the monumental difference between laboratory torture tests and everyday consumer use. Consider the arithmetic for an active gamer:
- If you play your handheld console for an average of 2 hours every single day, reaching 7,000 hours would take 3,500 days—over 9.5 years of gaming!
- Furthermore, real gamers never stare at a single frozen frame. Real gameplay includes camera movement, dialogue cutscenes, loading screens, inventory screens, game over sequences, and alternating game genres.
- Therefore, for standard gaming patterns, the likelihood of causing noticeable burn-in on a Switch OLED within the console's practical lifespan is virtually non-existent.
Steam Deck OLED Innovations: Samsung Custom 90Hz HDR Panel Architecture
When Valve engineered the Steam Deck OLED, they partnered with Samsung Display to craft a custom 7.4-inch 90Hz OLED panel tailored specifically to the unique thermal and graphical demands of PC handheld gaming. Several key engineering choices make the Steam Deck OLED panel exceptionally resilient against steam deck oled burn in:
1. Custom Sub-Pixel Wear Distribution
Unlike smartphone OLED screens that frequently employ legacy diamond pentile layouts optimized for portrait text scrolling, Samsung and Valve designed a custom sub-pixel layout engineered for PC gaming clarity. Sub-pixel apertures were balanced to provide equal luminous efficiency across Red, Green, and Blue emitters, avoiding disproportionate strain on the blue sub-pixel stack during prolonged HDR gameplay.
2. Internal Structural Heat Isolation
In modern smartphones, the processor, RAM, and battery are tightly sandwiched directly behind the OLED display glass, creating localized thermal hot spots that accelerate sub-pixel degradation. Valve engineered the Steam Deck OLED with a rigid magnesium alloy internal chassis and an aluminum thermal heat shield that physically isolates the screen assembly from the AMD "Sephiroth" 6nm APU. A redesigned, larger custom fan and wider heat pipes exhaust internal thermals out the top of the chassis, keeping display junction temperatures remarkably low even during 15W TDP AAA gaming sessions.
3. Intelligent SteamOS Display Management
SteamOS 3.5+ integrates hardware-level ambient light sensing with dynamic tone-mapping. In HDR mode, peak brightness reaches a dazzling 1,000 nits on small specular highlights (such as torches, spells, and explosions), while full-field scenes and static HUD elements are automatically managed around 600 nits. This protects static UI zones from excessive thermal dissipation while preserving jaw-dropping dynamic contrast.
Fixed Game HUDs: Temporary Image Retention (TIR) vs. Permanent Burn-In
Many handheld gamers experience moments of panic after finishing an intensive multi-hour session of games like Elden Ring, Hades, Diablo IV, or Vampire Survivors. Upon returning to the home screen or pausing to a flat gray menu, they notice faint outlines of stamina meters, potion flasks, or mini-maps. Understanding what is happening on a molecular level will instantly relieve your anxiety:
Temporary Image Retention (TIR) — Reversible
Temporary Image Retention is an electrical phenomenon that occurs within the thin-film transistor (TFT) backplane layer beneath the organic emitters. When sub-pixels are driven continuously at a fixed voltage to display a static HUD element, microscopic capacitive charges become temporarily trapped in the TFT gate insulators. When the image changes, this residual charge prevents the transistors from settling back to their baseline ground state instantly, producing a faint "ghost" outline. TIR is 100% harmless and completely reversible. It clears naturally as the panel rests, or can be flushed in minutes using dynamic color exercises.
Permanent Organic Burn-In — Irreversible Degradation
True burn-in is a photochemical breakdown of the organic electroluminescent compounds. Over thousands of cumulative hours of sustained high voltage and heat, the organic molecules lose their ability to emit light at their original lumen efficiency. This causes permanent uneven brightness across the screen. As established in the 7,000-hour torture tests, causing permanent burn-in on modern handheld panels requires years of extreme, deliberate static torture.
Why Handheld Games Naturally Prevent Burn-In:
Handheld video games possess built-in variety. Every fast-travel loading screen, inventory pause menu, dialogue exchange, and cutscene acts as a natural pixel exercise routine. These regular scene transitions disrupt continuous static voltage, allowing sub-pixels to cool and preventing capacitive retention from taking hold.
How to Run the Screen Fix Tool on Handheld Consoles (Steam Deck & Switch)
If you observe stubborn temporary ghosting or want to refresh your sub-pixels after a marathon gaming weekend, you can execute our free, browser-based dynamic chromatic flasher at /launch/ directly on your handheld console. Follow the specific instructions below for your device:
Method A: Running the Tool on Valve Steam Deck OLED
- Switch to Desktop Mode: Press the physical STEAM button on the left side of your Deck, scroll down to Power, and select Switch to Desktop.
- Open Your Web Browser: Launch Google Chrome, Firefox, or Brave from your desktop taskbar or application menu. (If you haven't installed a browser yet, open the Discover Software Center shopping bag icon on the taskbar, search for "Chrome" or "Firefox", and click Install).
- Navigate to the Fix Tool: In the browser address bar, visit /launch/.
- Enter Borderless Fullscreen: Press F11 to enter full screen. On Steam Deck, you can press STEAM + X to bring up the on-screen keyboard, or map one of the rear grip buttons (L4/R4) to F11 in Desktop Controller Settings. Alternatively, tap the browser's menu (three dots) and tap the fullscreen icon.
- Adjust Display Brightness: Press the quick access button (...) on the right side of your Deck and set screen brightness to roughly 75%–85%.
- Run Dynamic Chromatic Flashing: Start the rapid RGB spectrum cycling or dynamic static pattern. Allow the flasher to run uninterrupted for 30 to 45 minutes. The high-speed alternation exercises each sub-pixel, discharging residual TFT capacitive latency and restoring uniform pixel balance.
- Return to Gaming Mode: Double-click the "Return to Gaming Mode" shortcut on your desktop. Your Steam Deck OLED display is now fully refreshed!
Method B: Running the Tool on Nintendo Switch OLED
While the Nintendo Switch does not have a dedicated public browser app icon on the home menu, it contains a built-in NetFront browser used for Wi-Fi hotspot authentication. You can easily access the web using the safe, well-known SwitchBru DNS bypass:
- Access Internet Settings: From the Switch home menu, open System Settings (gear icon), select Internet, and tap Internet Settings.
- Edit Wi-Fi Connection: Select your currently connected Wi-Fi network and choose Change Settings.
- Configure Manual DNS: Scroll down to DNS Settings and switch it from Automatic to Manual.
- Enter Primary DNS: Set the Primary DNS to
045.055.142.122(this is the safe, established SwitchBru DNS portal). Leave Secondary DNS as008.008.008.008or default. - Save and Connect: Select Save, then tap Connect to this Network.
- Launch the Hidden Browser: A prompt will appear stating "Registration is required to use this network." Tap Next. The SwitchBru Web Browser portal will open on your Switch screen.
- Navigate to Fix Burn In: Tap the URL bar or Google Search option inside the portal and enter /launch/.
- Run the Tool: Once the tool loads, tap to activate the dynamic color flasher and let it run for 30 to 45 minutes at 80% screen brightness.
- Revert DNS Settings: When finished, press the Home button, return to System Settings > Internet > Internet Settings > Change Settings, and switch DNS back to Automatic to restore standard online gaming.
Recommended Handheld System Settings for Maximum OLED Lifespan
Both Nintendo and Valve have integrated intuitive settings that maximize your handheld OLED panel's operational lifespan. Configuring these options takes less than two minutes:
Optimal Nintendo Switch OLED Settings
- Enable Auto-Brightness: Open System Settings > Screen Brightness and toggle Auto-Brightness to ON. The built-in ambient light sensor dynamically adjusts display luminance according to room lighting, avoiding unnecessary sub-pixel overdriving in dark environments.
- Set Auto-Sleep (Handheld Mode) to 3 Minutes: Navigate to System Settings > Sleep Mode > Auto-Sleep (Playing on Console Screen) and select 3 Minutes. If you put your Switch down to answer the door or take a call, the console sleeps quickly, protecting the screen from prolonged static pauses.
- Avoid 100% Brightness Indoors: While playing outdoors in direct sunlight requires high brightness, indoor gaming is best enjoyed at 50% to 70% brightness, which reduces thermal generation and dramatically extends battery life.
Optimal Valve Steam Deck OLED Settings
- Enable Ambient Light Sensor: Press the STEAM button, open Settings > Display, and toggle Enable Adaptive Brightness to ON. SteamOS will intelligently balance brightness and thermal load.
- Set Display Dim & Sleep Timeouts: In Settings > Display, configure the screen to Dim Display after 3 minutes of inactivity, and enter Sleep after 5 to 10 minutes.
- Calibrate HDR Peak Luminance: When playing HDR-compatible titles in SteamOS, use the HDR calibration slider to ensure peak specular highlights are balanced without washing out SDR baseline game elements.
- Utilize Per-Game TDP Limits: Using the Quick Access Menu (...), setting a reasonable TDP limit (e.g., 8W to 12W on indie titles) keeps internal chassis temperatures cool, which indirectly keeps the OLED panel cooler and extends organic emitter longevity.
Final Verdict: Why You Can Play Handheld OLED Games Without Burn-In Anxiety
Modern OLED handhelds represent the pinnacle of portable display technology. The empirical findings from 7,000-hour torture marathons prove beyond doubt that today's OLED panels are astonishingly tough, resilient consumer devices. Handheld gaming is naturally dynamic—punctuated by loading screens, dialogue trees, diverse game libraries, and regular power cycles that prevent stationary sub-pixel fatigue.
Whether you are embarking on a 150-hour journey across Hyrule on your Nintendo Switch OLED or battling through Hades on your Steam Deck OLED at silky 90Hz, you do not need to baby your device or play in constant fear of HUD burn-in. Keep adaptive brightness enabled, set a 3-minute sleep timer, and if you ever notice faint temporary ghosting after a weekend marathon, run our dynamic recovery flasher at /launch/ to keep your handheld screen in pristine, breathtaking condition.