Playing GTA 6 on OLED? HUD Burn-In Reality, Safe HDR & PS5 TV Guide
📅 November 20, 2026fix burn-inScreen knowledge
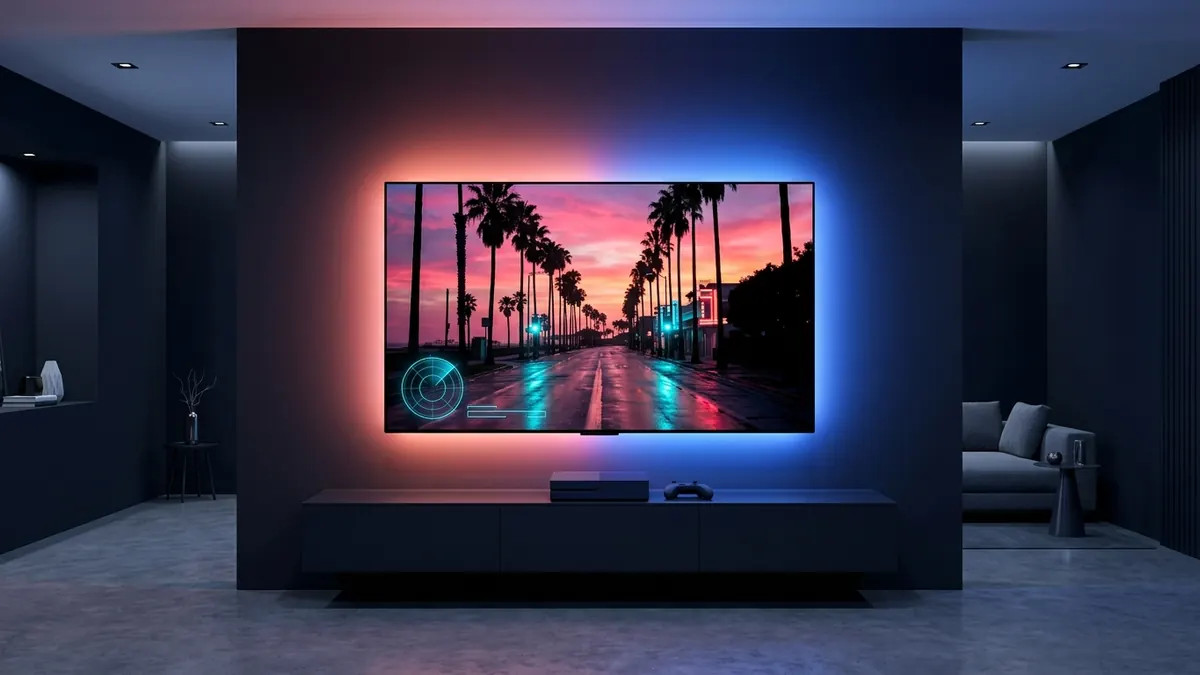
With Rockstar Games officially launching Grand Theft Auto VI on November 19, 2026 for PlayStation 5, PS5 Pro, and Xbox Series X|S, millions of players are logging marathon sessions across the sun-bleached highways of Leonida and the neon-drenched boulevards of Vice City. An OLED TV or 4K HDMI 2.1 OLED gaming monitor is undeniably the definitive way to experience Jason Duval and Lucia Caminos' story—delivering true zero-nit nighttime blacks in the Grassrivers wetlands alongside searing specular reflections off rain-slicked Ocean Beach asphalt. Yet as 6-hour launch nights turn into 150-hour completionist runs, one question is dominating display forums: will GTA 6 cause OLED burn-in?
The honest hardware answer is reassuring: modern WOLED and QD-OLED panels will handle hundreds of hours of GTA 6 without permanent damage—provided you avoid three specific static luminance traps. Most early launch-week scares—such as spotting a faint circular radar outline on a dark loading screen—are reversible Temporary Image Retention (TIR) rather than permanent organic sub-pixel wear. Below, we break down the exact sub-pixel physics of GTA 6's minimap and contextual HUD, walk through HGiG and in-game Paper White HDR calibration on PS5 and Xbox, list the exact panel-protection menu paths for LG, Samsung, and Sony OLED TVs, and show how console players can safely run a 30-second uniformity check or pixel refresh.
"Doesn't the Minimap Move?" — How GTA 6's HUD Actually Affects OLED Sub-Pixels
A common misconception in gaming threads is that because streets, coastlines, and traffic icons scroll continuously as you drive through Vice City, the bottom-left radar cannot possibly contribute to uneven OLED wear. To understand what is completely harmless versus what actually stresses your panel, you have to separate dynamic interior pixels from anchored interface coordinates.
1. Why the Scrolling Streets Inside the Radar Are Safe
Organic light-emitting diodes age cumulatively based on electrical drive current multiplied by thermal load over hundreds of hours. Inside the GTA 6 minimap viewport, road lines, building footprints, water channels, and police cones translate and rotate every time you touch the left stick or accelerator. Because those interior sub-pixels constantly alternate between dark asphalt grays, cyan water tones, and brief route highlights, their electrical load averages out smoothly—meaning the moving map terrain itself does not cause burn-in.
2. Why GTA 6's Contextual HUD Is Much Safer Than GTA V
Rockstar's UI engineering in Grand Theft Auto VI is substantially friendlier to emissive displays than 2013-era GTA V, which permanently bolted solid green health, blue armor, and yellow special-ability rectangles underneath a fixed radar frame. By default in GTA 6, core status overlays are contextual:
Top-Left Status Gauges (Health, Stamina & Focus): Automatically fade off-screen when you are cruising, walking, or exploring safely outside active combat or heavy exertion.
Top-Right Action Readouts (Weapon, Wanted Stars & Cash): Appear dynamically when drawing firearms, evading Leonida law enforcement, or completing a cash transaction, then retract cleanly into the background.
Dynamic Navigation Modes: Under Pause Menu → Settings → UI → Navigation Experience, Rockstar provides Minimap (Dynamic) and Minimap & Compass (Dynamic) options alongside Always On and Off. In Dynamic mode, even the radar hides indoors or during calm exploration until you summon it with a tap of D-Pad Down.
3. The 3 Static Culprits That Actually Accumulate Stress Over 100+ Hours
Even with a moving map interior and auto-hiding combat meters, three specific pixel zones remain static enough across 100-to-300-hour playthroughs—and inevitable GTA 6 Online grinds—to demand smart configuration:
The Persistent Radar Border Ring & Centered White Player Arrow: If you set Navigation Experience to Always On (or spend dozens of uninterrupted hours driving across Leonida), the outer boundary ring of the bottom-left minimap, the crisp white player arrow locked dead-center inside that radar, pinned waypoint perimeter icons, and persistent vehicle/fuel indicators occupy the exact same pixel coordinates regardless of how fast the streets scroll underneath them.
Maxed-Out HDR White UI Elements: Pure white HUD text, compass ticks, and the centered player icon become problematic only when TV Dynamic Tone Mapping (DTM) or an inflated in-game Paper White setting forces static UI graphics to blast 400 to 800+ nits continuously, rather than sitting at a comfortable SDR-equivalent 120–200 nits.
Leaving the Game Idle on the Static Pause or Leonida Map Screen: Stepping away for 30 to 60 minutes to eat dinner or scroll your phone while GTA 6 sits frozen on the high-contrast Pause Menu or full-screen Map locks bright white borders and saturated legend icons onto identical sub-pixels at zero motion. This single habit is the #1 trigger of immediate temporary image retention during launch weekend.
Quick In-Game HUD Tip: Open Pause Menu → Settings → UI and keep Navigation Experience set to Minimap (Dynamic) rather than Always On. Whenever you need to check a highway exit or alley turn, tap D-Pad Down to bring the radar up on demand. That single toggle cuts cumulative static corner exposure by 60% to 80% over a full campaign.
Safe HDR & Console Calibration for GTA 6 (PS5, PS5 Pro & Xbox Series X|S)
Misconfigured HDR is the fastest way to turn harmless game UI into high-thermal sub-pixel stress—while simultaneously ruining Vice City's visual depth. Out of the box, many OLED TVs default to aggressive tone-mapping modes that over-brighten static HUD elements, while GTA 6's default internal sliders raise black levels unnecessarily. Follow this exact three-layer calibration sequence so specular highlights pop at full peak brightness while HUD icons stay cool and safe.
Step 1: Enable HGiG on Your OLED TV Before Touching Console Sliders
Never calibrate a PS5 or Xbox while your TV's Dynamic Tone Mapping (DTM) is active. DTM analyzes incoming frames in real time and artificially boosts average picture level (APL). Not only does DTM fool your console's HDR test patterns into sending clipped 4,000-to-10,000-nit metadata, it also continuously cranks static white HUD icons, subtitles, and radar borders to searing brightness. Enabling HGiG (HDR Gaming Interest Group) disables TV-side dynamic brightness pumping so your console maps highlights cleanly to your OLED's real hardware ceiling:
LG webOS OLED (C2 / C3 / C4 / G3 / G4): Ensure Picture Mode is set to Game Optimizer, then navigate to Settings (Gear Icon) → All Settings → General → Game Optimizer → Screen → Tone Mapping Compensation (or Picture → Brightness → Dynamic Tone Mapping on older firmware) and select HGiG.
Samsung QD-OLED (S90C / S90D / S95C / S95D): With Game Mode active on an HDR input, hold the Play/Pause button on your remote to open the Game Bar (or navigate to Menu → Settings → All Settings → Connection → Game Mode Settings → Game HDR) and set Game HDR to Basic (Samsung's HGiG implementation). Next, open Settings → All Settings → Picture → Expert Settings → HDR Tone Mapping and set it to Static (with Peak Brightness set to High). Avoid Game HDR: Advanced or Tone Mapping: Active, which force dynamic mid-tone boosting.
Sony Bravia XR OLED (A80L / A95L / Bravia 8): Open Quick Settings (Gear Icon) → Settings → Display & Sound → Picture → Brightness → HDR tone mapping and select Gradation Preferred rather than Brightness Preferred. (If you manually run the PS5 calibration wizard rather than relying on Sony's Auto HDR Tone Mapping handshake, temporarily set HDR tone mapping to Off while clicking through the PS5 test screens, then return it to Gradation Preferred afterward.)
Step 2: Calibrate System-Level HDR on PS5 / PS5 Pro or Xbox Series X|S
PlayStation 5 & PS5 Pro: Navigate to Settings → Screen and Video → Video Output → Adjust HDR. On Screen 1 and Screen 2 (white sun symbol), press Up on the D-pad until the sun pattern just barely vanishes into the surrounding white box (matching ~800 to 1,500 nits in HGiG depending on your OLED generation). On Screen 3 (Black Level), press Down all the way to the absolute bottom limit (0 clicks) so pure black pixels shut completely off at 0.000 nits.
Xbox Series X|S: Open Settings → General → TV & display options → Calibrate HDR for games. Pull the Minimum Luminance slider all the way left to 0, then adjust the two Maximum Luminance screens in HGiG until the gray checkerboard squares just blend into a solid white square.
Step 3: Dial In GTA 6's In-Game HDR Settings (Paper White & Black Floor)
Inside GTA 6, open Pause Menu → Settings → Display. Rockstar's internal HDR pipeline behaves uniquely—most notably because its Paper White slider subtly scales overall luminance alongside interface white level, while its default black floor is elevated for LCD TVs:
Paper White (Set to 35–45): Leaving Paper White cranked up blasts static white HUD arrows, wanted stars, and subtitles at excessive nit levels and washes out bright Leonida daytime skies. Dropping Paper White into a conservative 35 to 45 window anchors UI elements in a panel-friendly ~120–200 nit range while preserving natural daytime contrast.
Max Brightness (Match or Compensate for Peak Highlights): Because lowering Paper White slightly pulls down the top of GTA 6's internal curve, set Max Brightness high enough (often 1,200–2,000 on modern 1,000+ nit MLA+ WOLED and Gen 3 QD-OLED panels) so transient 1%–2% specular highlights—neon strip-mall signs, police lightbars, and midday sun glints on waves—still hit true peak luminance without dragging static HUD graphics up with them.
Black Levels (Lower from 50 to 15–20):GTA 6 defaults Black Levels to 50, which lifts shadows into a glowing charcoal haze on OLED screens. Lowering this slider to roughly 15 to 20 (right where the dark reference pattern becomes barely discernible in a dim room) restores true ink-black night skies and turns zero-black OLED sub-pixels completely off—eliminating wasted current and heat across dark scenes.
Playing your PS5 Pro or Xbox Series X at a desk on a 27-inch or 32-inch 4K HDMI 2.1 gaming monitor instead of a living-room TV? Check our dedicated QD-OLED vs. WOLED gaming monitor durability and protection guide for monitor-specific OSD care toggles, heatsink comparisons, and 3-year warranty details.
Exact OLED TV Built-In Protection Settings (LG, Samsung & Sony)
Every modern OLED TV ships with hardware-level algorithms engineered specifically for static broadcast logos and video game HUDs—including localized logo luminance detection (which dims stationary corners like the GTA 6 radar ring by 20%–35% after a few minutes without dimming the active center of your screen) and micro-pixel orbiting. Verify these exact settings before starting a long Vice City session:
Protection Feature
LG webOS OLED (C2 / C3 / C4 / G3 / G4)
Samsung QD-OLED (S90C / S90D / S95C / S95D)
Sony Bravia XR OLED (A80L / A95L / Bravia 8)
Static Logo / HUD Dimming
Settings → All Settings → General → OLED Care → OLED Panel Care → Adjust Logo Brightness → High
Menu → Settings → All Settings → General & Privacy → Panel Care → Adjust Logo Brightness → High
Automatic in XR Firmware (always active; no manual Off/High consumer toggle needed)
Pixel Shift / Screen Orbiting
General → OLED Care → OLED Panel Care → Screen Move → On
Automatic 5–10 min cycle in standby after 4 cumulative hours (OLED Panel Care → Pixel Cleaning)
Automatic short compensation in standby (Panel Care → Pixel Refresh)
Automatic short cycle after 4+ continuous hours of standby; reserve manual Panel refresh for ~once a year
CRITICAL RULE: Never Cut Power at a Wall Switch or Smart Plug! When you finish playing GTA 6 for the night, always turn your OLED TV off with its remote and leave mains AC power connected. LG, Samsung, and Sony OLEDs run their automated short Thin-Film Transistor (TFT) voltage-compensation cycles exclusively in standby mode after 4+ hours of cumulative use (and Sony Bravia OLEDs specifically require uninterrupted multi-hour standby windows before initiating their background cycle). Cutting power at a surge strip blocks those maintenance sweeps—allowing harmless temporary charge drift to stack up session after session. Conversely, do not manually trigger the 60-minute deep Panel Refresh every weekend; let the automatic short standby cycles do their job.
Seeing a Ghost Ring After a 6-Hour Session? TIR vs. Permanent Burn-In
Suppose you just wrapped up an 8-hour Saturday launch binge in Vice City—or just finished staring at the bright white sun boxes inside PS5's Adjust HDR menu—and suddenly spot a faint circular radar shadow or square outline when GTA 6 transitions to a dark gray loading screen. Take a breath: after a single marathon weekend, that silhouette is virtually guaranteed to be Temporary Image Retention (TIR), not permanent burn-in.
Multi-year accelerated longevity testing by display labs like RTINGS—running over 100 TVs and monitors through thousands of hours of high-luminance static torture—highlighted the crucial physical distinction between the two phenomena:
Temporary Image Retention (TFT Threshold-Voltage Drift): Every OLED sub-pixel is regulated by microscopic Thin-Film Transistors (TFTs) in the panel backplane. When a bright static HUD ring or calibration box sits on the same coordinates for several hours straight, residual capacitive charge temporarily shifts the threshold voltage of those transistors. Because the transistor briefly misjudges the exact drive voltage required for near-black dark grays (5% to 20% stimulus), a faint ghost outline appears on dim menus—even though the organic light-emitting material itself is 100% undamaged. Once the panel runs a dynamic pixel-refresh sweep or completes a single 4-hour standby compensation cycle, the voltage offset resets and the ghost vanishes completely.
Permanent Burn-In (Cumulative Organic Emitter Wear): True chemical burn-in occurs only when specific Red, Green, Blue, or White organic emitters lose peak luminance efficiency permanently after hundreds to thousands of cumulative hours of high-current, high-heat static exposure. Unlike TIR, permanent burn-in remains clearly visible across bright 50% gray, pure red, and yellow test slides even after an overnight standby compensation cycle.
How PS5, Xbox & Smart TV Gamers Can Run a 30-Second Uniformity Check & Pixel Refresh
Before running heavy TV maintenance routines, it takes less than 30 seconds to check whether a faint GTA 6 HUD shadow is minor dark-gray TFT drift or genuine sub-pixel wear—and to clear stubborn temporary retention cleanly—without relying on compressed streaming videos.
Run a 30-Second Fullscreen Check: Open FixBurnIn's Fullscreen Screen Burn-In Test (/screen-burn-in-test/). Tap the canvas to enter fullscreen (all on-screen controls auto-hide after 2.5 seconds so zero static buttons sit on your OLED). Cycle through 20% Gray and 50% Gray to check for TFT threshold-voltage shadows in the bottom-left radar zone, then check pure Red and Yellow presets to verify red/green sub-pixel uniformity where warm HUD alerts and GPS highlights sit. (Skip YouTube "burn-in test" videos—as explained in our YouTube vs. native browser OLED test comparison, 8-bit video compression creates fake gray banding and risks leaving YouTube's own static pause/watermark icons on screen.)
Clear Stubborn Ghosting with Uncompressed RGB Cycling: If a pause-menu silhouette or radar ring lingers after a marathon session, open FixBurnIn's Online Pixel Repair Tool (/launch/) in true borderless fullscreen for 15 to 30 minutes. Its GPU-rendered uncompressed RGB color-cycling, checkerboard inversion, and high-frequency pixel snow patterns exercise every sub-pixel evenly across all coordinates, dissipating trapped backplane charges before you power the TV into standby with your remote for its automated compensation pass.
2. Safe Fullscreen Setup by Console & Smart TV (Read Before Running on PS5!)
To test or refresh an OLED safely, the pattern must cover 100% of the active display edge-to-edge with zero static browser toolbars or overscan borders. Use the exact method that matches your living-room setup:
Xbox Series X|S (Built-In Microsoft Edge — Best Console Option): First remove Xbox's app overscan frame by opening Settings → General → TV & display options → Video fidelity & overscan and unchecking Apps can add a border. Then launch Microsoft Edge, navigate to fixburnin.com/screen-burn-in-test/ or fixburnin.com/launch/, and trigger fullscreen for clean 100% panel coverage.
Samsung OLED TVs (Samsung Internet App): Open the native Internet app, click the top-right Menu → Settings → General, and set Hide Tabs and Toolbar automatically to Use (On). Once you tap fullscreen inside the tool, the top address bar slides completely off-screen.
LG webOS OLED TVs (Native Web Browser — Note the Top-Bar Caveat): Open the webOS Web Browser, click the three-dot menu in the upper-right corner, and uncheck Always show address bar. This works great for a quick 30-to-60-second uniformity inspection on the burn-in test page. However, because recent webOS firmware retains a thin ~15–20px gray strip along the very top edge even in fullscreen, do not leave the native LG browser running for 30+ minute repair cycles—connect a laptop via HDMI instead for long sessions.
HDMI Laptop, PC, or Mac (Universal Gold Standard for PS5 Players): Connect any Windows laptop or MacBook to a spare HDMI port on your TV, open our test or repair page, and press F11 (Windows) or Ctrl + Cmd + F (macOS) for true zero-chrome fullscreen.
Why PS5 & PS5 Pro Players Should NOT Use the Hidden Message Browser + Zoom Trick: PlayStation 5 omits a public web browser, and while some guides tell players to send a URL through PlayStation Messages and press PS Button + Square (Settings → Accessibility → Display and Sound → Zoom) to fill the screen, do not use this workaround for OLED pixel repair or extended static tests. The restricted PS5 pop-up browser cannot enter native borderless fullscreen, and magnifying it crops the canvas while pinning high-contrast system borders along the edges—creating the exact uneven sub-pixel boundary you want to prevent. Use your Samsung TV browser, a quick LG check, or an HDMI laptop instead.
Frequently Asked Questions: GTA 6 on OLED TVs & Monitors
Does the GTA 6 minimap cause OLED burn-in if the map moves?
The scrolling streets and terrain inside the radar do not cause burn-in because those pixels change color and brightness constantly. What actually stays static over 100+ hour playthroughs is the outer radar border ring, the centered white player arrow, and any HUD meters forced on permanently. Setting Pause Menu → Settings → UI → Navigation Experience to Minimap (Dynamic) and enabling your TV's Logo Brightness adjustment virtually eliminates this risk.
Should I use HGiG or Dynamic Tone Mapping for GTA 6 on LG and Samsung OLED TVs?
Always choose HGiG (set Tone Mapping Compensation to HGiG on LG OLEDs, or Game HDR: Basic + HDR Tone Mapping: Static on Samsung QD-OLEDs) before calibrating your console. Dynamic Tone Mapping artificially pumps average screen brightness frame-by-frame, over-brightening static white HUD elements and radar borders continuously while clipping Vice City's neon highlights.
Does max HDR Paper White in GTA 6 accelerate OLED burn-in?
Yes—driving static white UI text, compass markers, and player icons at maximum luminance generates unnecessary current and heat on identical sub-pixels. Keeping GTA 6's in-game Paper White slider in a conservative 35 to 45 range keeps HUD elements around a safe 120–200 nits while still letting true HDR specular highlights hit your OLED's full peak brightness.
Why do I see a faint radar ring or square box after playing GTA 6 or calibrating PS5 HDR?
After a 6-hour gaming session or staring at the bright white sun boxes in PS5's Adjust HDR wizard, a faint outline on dark gray loading screens is Temporary Image Retention (TIR) caused by Thin-Film Transistor (TFT) threshold-voltage drift—not permanent organic burn-in. Powering your OLED TV off with the remote (leaving wall power plugged in) allows its 4-hour standby compensation cycle to clear the ghost automatically, or you can clear it faster using uncompressed RGB pixel cycling.
Can I open an OLED burn-in test or pixel fixer directly on PS5?
No—avoid using PS5's hidden message-link browser combined with the PS + Square Accessibility Zoom trick for burn-in repair. Because PS5's restricted browser cannot enter true borderless fullscreen, zooming leaves static system borders pinned on screen. Instead, PS5 owners should run /screen-burn-in-test/ or /launch/ via an HDMI-connected laptop/PC, Samsung TV Internet (with auto-hide toolbars enabled), or a brief 1-minute gray check on LG's webOS browser.
Test or Repair Your Display Free in Browser
Check full-screen 50% gray, white, black & RGB uniformity first, or run uncompressed color-cycling patterns to clear temporary image retention.